If you haven't had time to check out Life Cycle Services (LCS) for Dynamics AX yet, then you should know you're missing out on some pretty cool features. Microsoft provides this service for Customers and Partners and I would encourage IT pros to check it out. You should at least install and test this in your own sandbox and test environment.
The LCS has been around for a while now. It was covered by the Technical Conference back in October 2012 and the service has evolved more since then. It was officially released summer 2013 and Microsoft has been improving it since. You can stay updated on latest news and changes by subscribing to the LCS Blog here: http://blogs.msdn.com/b/lcs/
I didn't set aside enough time to check it out right away when it was published, but lately I have been testing it and I wanted to post a short article on my findings. Life Cycle Services is covering a lot of ground, but I will focus on System Diagnostics collection part.
So you begin this by creating a new project on the Life Cycle Services website. Log on with the Microsoft Account (aka. LiveID) associated with your Customer or Partner account. Navigation is simple and intuitive, so I'll assume you figure out how to create your new project. You will have to add additional team members manually, but it is just as easy as creating a new project.
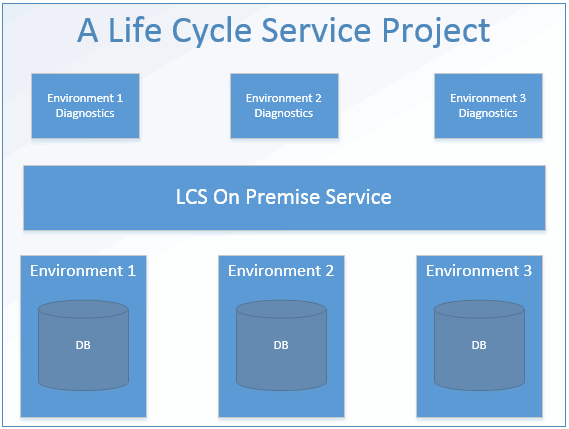
The idea here is to have a project where you can collect diagnostics from one or multiple environments.
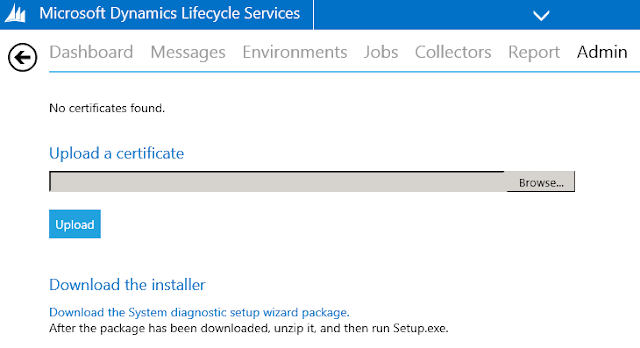
When the project is created, you can open it and then Open the System Diagnostics tile. By default, you will be thrown in the Admin section and from there you can download the installer of the LCS Service. Installing the Service is pretty straight forward. Just follow the steps in the guide and you should be good. It takes just a few minutes. I opted for using the business connector as the Service Account. If the installer says the service couldn't start, just head over to Group Policy and make sure the service account actually is allowed to run as a service. If you want this to be a smooth experience, you probably should go through the security setup mentioned in the install guide. If you do implement permissions locally after the service has been installed and started, remember to restart the service. Otherwise it will not pick up any changed permissions.
The next step is to upload environment(s) to the project. You use the LCS Environment Discovery Tool for this. Start by typing in a name for the environment. This will be visible in the LCS website so make sure to use a name that makes sense. Type in SQL Server instance and the name of the business database. Then hit "Discover" and observe if the tool discovers the instance. If it fails, you've most likely forgot to grant the service account read access to the database. If it succeeds, simply press "Upload" to have the environment be available in the LCS website. You can redo this for more environments if needed.
In order to keep the website updated on the environments health, you should add a task that uploads updated information to the website. Just use the Generate command button to create the command line, and add a scheduled task for it. Make sure it runs even though you're not logged in.
I should add that I recently got a message on one of my other projects stating that the LCS had updated the on premise tool. I simply downloaded, stopped the service, ran setup, reused the existing certificate, and it was updated. Lovely!
And that is it. I expect more improved content and features on the LCS website in the future.


No comments:
Post a Comment